Imagine it is 7am. You fold your Murphy bed flush against the wall, and in about 30 seconds your studio transforms from a bedroom into a real living space. No more guests sitting on your mattress. No more feeling like you live inside a bed. That single moment is why studio apartment renters who install a Murphy bed almost never go back to a regular bed frame. This guide walks through 12 specific setups, from the classic shelf-flanked Murphy to budget loft alternatives, so you can pick the one that matches your floor plan, your style, and what you actually need from your space.

Why Murphy Beds Work So Well in Studio Apartments
A studio apartment typically gives you 300 to 500 square feet. A queen bed frame eats roughly 33 square feet of that floor space, and it sits there 24 hours a day whether you are using it or not. A Murphy bed reclaims all 33 square feet every morning.
But floor space is only part of it. The bigger win is psychological. When a bed is visible, the brain reads the room as a bedroom. Hide the bed, and the same square footage feels like a living room, a home office, or an entertainment space. That perceptual shift matters a lot if you work from home, host friends, or just want your apartment to feel like more than a place to sleep.
Murphy beds also give renters an anchor for the whole room. The bed wall becomes the main feature wall, and everything else organizes around it. You get to design a real room, not just arrange furniture around a mattress.

Studio Apartment Ideas with Murphy Bed and Built-In Storage (Setups 1 to 3)
These three setups build storage directly into the Murphy bed wall. They cost more than a standalone fold-down bed, but you gain significant organization capacity at the same time.
Setup 1: Classic Side Shelves. The most common Murphy bed configuration pairs the fold-down panel with two flanking shelf towers. When the bed is stowed, you see what looks like a built-in wall unit with shelves for books, plants, and decorative objects. When you pull the bed down, it sits between the towers. Plan for towers that are at least 12 inches deep so you can store standard paperbacks and small bins. This is the setup most Murphy bed companies show in their brochures because it photographs beautifully and works in almost any studio layout.
Setup 2: Floor-to-Ceiling Storage. Push the shelf towers all the way to the ceiling and add cabinets with doors above the fold-down panel. This version is popular in cities like New York and San Francisco where renters need maximum storage. The closed cabinet doors above the bed create a clean horizontal line that makes the ceiling feel higher. Budget for a custom unit here: the standard IKEA PAX hack can approximate this look, but factory-built systems from Resource Furniture or Wallbeds Direct are more reliable. Expect to spend $2,500 to $5,000 installed.
Setup 3: Murphy Bed with Mirror Panel. Instead of shelves on the side, this version uses a large mirror on one side of the bed panel. The mirror makes the studio feel twice as wide and adds useful functionality for getting dressed. Use this version if your studio is particularly narrow, under 15 feet wide. The mirror can be full-length or split into two or three panels set into a wooden frame. Some Murphy systems sell mirror-front panels as an optional upgrade for around $300 to $600 extra.

Studio Apartment Ideas with Murphy Bed and a Dedicated Workspace (Setups 4 and 5)
One in three remote workers lives alone in a small apartment. If that describes you, the Murphy bed plus workspace combo may be the most practical setup in this guide.
Setup 4: Murphy Bed with Fold-Down Desk. Several Murphy bed systems include a horizontal surface that folds down to become a desk when the bed panel is raised. When the bed is stowed, the desk is deployed. When you want to sleep, the desk surface folds away and the bed comes down. This is the best solution for studios under 350 square feet because the bed and desk share the same wall zone without ever overlapping. Look for systems where the desk surface is at least 48 inches wide and 20 inches deep. The Clei and Expand Furniture lines both offer well-engineered versions of this configuration, starting around $2,800.
Setup 5: Separated Bed and Desk Zone. If you can spare 8 feet of wall space, consider a Murphy bed on one section of the wall and a permanent desk setup 4 to 6 feet away on the same wall. A narrow floating shelf at desk height ties the two together visually. This works better than the fold-down desk in studios where you need the desk accessible even when the bed is down, for example if you take evening video calls. The desk does not have to be fancy: a 48-inch IKEA ALEX desk with a drawer unit runs about $250 and looks intentional next to a Murphy panel.
For more ways to build a functional workspace into a tight footprint, see our guide on using a bookshelf as a room divider in a studio apartment.

The Sofa Murphy Bed Combo (Setups 6 and 7)
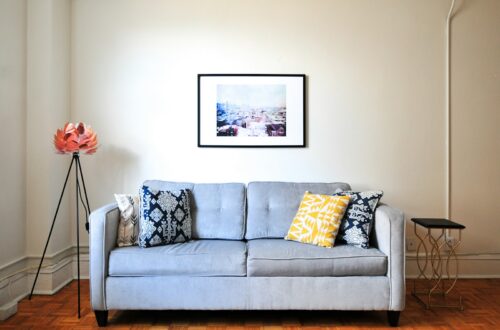
The sofa-Murphy combo is the setup most people picture when they say “studio apartment.” Done right, it creates a genuine living room when guests arrive.
Setup 6: Murphy Bed over a Sofa. This version places a low-profile sofa directly in front of the Murphy bed panel, parallel to the wall. When you pull the bed down, it unfolds over and behind the sofa, so the sofa is still accessible while the bed is deployed. You sleep on the Murphy, not the sofa. Guests sit on the sofa during the day. The key measurement here is sofa depth: keep it at or under 30 inches so the bed folds down without pushing the sofa out into the middle of the room. A sofa like the IKEA VIMLE or the Article Sven at 30 to 32 inches deep works well for this configuration.
Setup 7: Murphy Bed Adjacent to a Sofa with a Sectional. If you have a wider studio (20 feet or more across), position the Murphy bed on one end of the main wall and run a small sectional sofa along the perpendicular wall, creating an L-shape seating area that faces the bed wall like a proper living room. When guests arrive, the bed stays folded. When you sleep, the sectional defines the room and you have a real bedroom. This setup works especially well when the Murphy wall is on the far end from the entrance, so the living area greets you first when you walk in.
For studio renters who want more visual separation between sleep and living zones, our post on curtain divider ideas for studio apartments covers how to use fabric as a flexible partition.

The Loft Bed as a Budget Murphy Bed Alternative (Setups 8 and 9)
Murphy beds range from $1,200 for a basic wall-mount panel to $6,000 or more for a full custom storage system. If that is out of budget, a loft bed accomplishes a similar goal at a fraction of the cost.
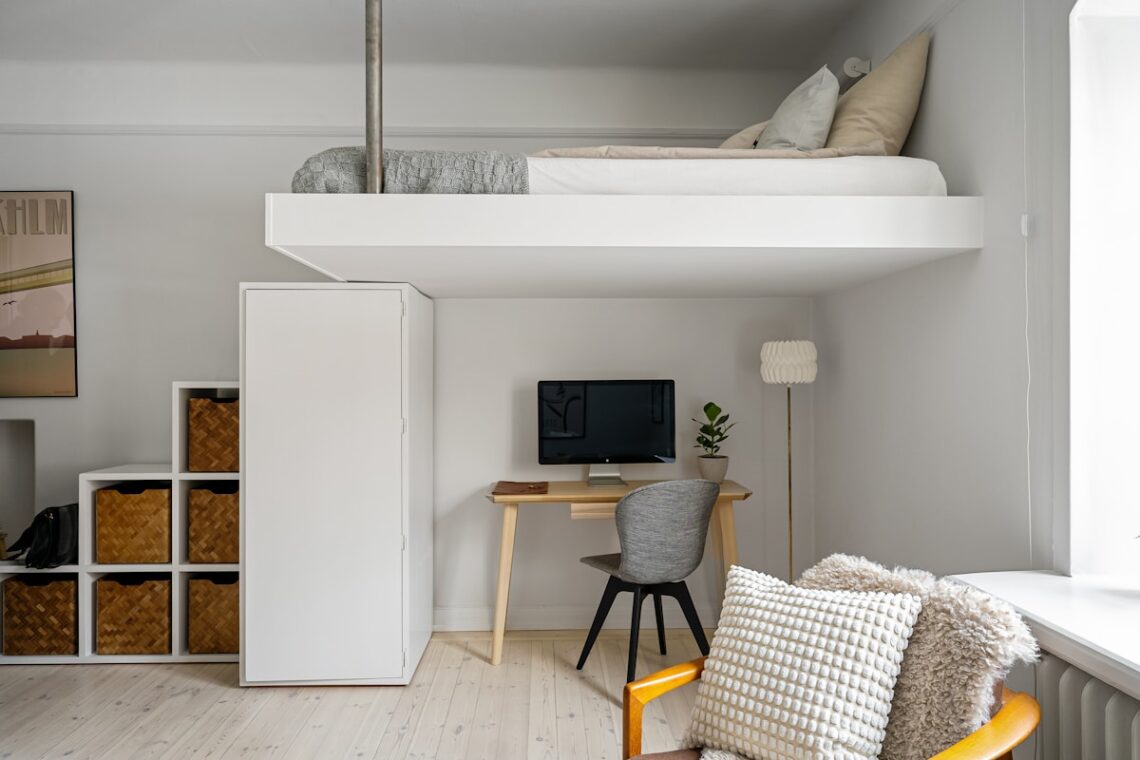
Setup 8: Standard Loft Bed with Living Area Below. A loft bed raises the mattress 5 to 6 feet off the floor, freeing up roughly 40 square feet of floor space underneath. Use that area for a desk, a small sofa, or both. This is the go-to setup for studios with at least 9-foot ceilings. The trade-off is that the bed is always visible, but because it is elevated, it reads more as a loft feature than a bed parked in the middle of your living room. IKEA’s STUVA and SMASTAD loft beds start at around $400 and are renter-friendly since they do not require wall mounting.
Setup 9: Low-Profile Loft with Under-Bed Storage. For ceilings under 9 feet, a shorter loft bed raised 3 to 4 feet creates a useful under-bed storage zone rather than a full living area. Use the space for rolling bins, storage boxes, or a short two-drawer filing cabinet. This is the most budget-friendly option and works well in studios where floor-to-ceiling clearance is limited. A platform bed with 18 inches of clearance underneath and some $15 IKEA SKUBB boxes already upgrades your storage significantly.

Lighting That Makes Your Murphy Bed Setup Feel Like Two Rooms (Setup 10)
The biggest complaint about Murphy beds is that they look clinical when folded down, like a piece of furniture waiting to be returned to a factory. Lighting is the fastest fix.
Setup 10: Integrated Sconces and LED Strip Lighting. Install a pair of plug-in wall sconces on the side panels of the Murphy bed cabinet, one on each side at eye level (roughly 60 to 66 inches from the floor). When the bed is down, these become bedside reading lights. When the bed is up, they illuminate the shelves or objects on either side, making the whole wall feel intentional and warm. Plug-in sconces like the Schoolhouse or Rejuvenation models run $80 to $150 each and require no electrical work.
Add a strip of warm LED lights (2700K to 3000K color temperature) along the top of the Murphy panel, tucked behind a small lip of wood trim so the strip is hidden. When the sconces and the LED strip are both on, the bed wall glows softly and reads as the anchor of a cozy bedroom rather than a mechanical fold-down device. Pair this with a dimmable floor lamp on the opposite side of the studio for the living room zone. Two separate light sources, two different moods, one room.

Smart Storage for Your Studio Apartment Murphy Bed Setup (Setup 11)
A Murphy bed creates space, but only if the rest of your studio stays organized. Setup 11 pairs the Murphy with a full-wall storage strategy that hides clutter completely.
Setup 11: Full-Wall Storage Around the Murphy Bed. Treat the entire wall that holds the Murphy bed as one continuous storage unit. Flanking cabinets run floor to ceiling on both sides of the bed panel. Overhead cabinets span the full width above the panel. A low bench with drawers or lift-top storage runs below the panel at floor level.
When the bed is stowed, the entire wall reads as a custom built-in. The bench provides a surface for putting on shoes and sets an easy place for keys and bags. The overhead cabinets hide extra bedding, out-of-season clothes, and rarely used kitchen gear. The tall side cabinets absorb the wardrobe, books, and anything else that would normally clutter the room. In a studio under 400 square feet, this approach can essentially eliminate the need for a separate wardrobe, dresser, or storage ottoman.
The IKEA PAX system combined with a third-party Murphy mechanism (StoreWallBeds and Create Your Bed offer flat-pack kits) can replicate this look for under $1,500 total.
For more storage solutions that do not require a big budget, check out our list of small apartment storage hacks under $50.

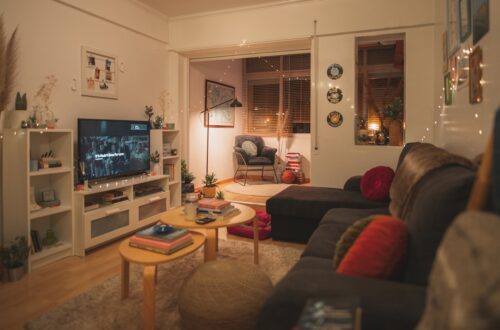
The Reading Nook and Floor-Level Lounge Setup (Setup 12)
The final setup treats the floor space freed up by the Murphy bed as an opportunity for a cozy nook rather than conventional furniture.
Setup 12: Murphy Bed with a Floor-Level Lounge Corner. When the bed is stowed, a section of floor near the window gets treated as a dedicated lounge area. A large floor cushion or a pouf, two or three oversized pillows leaning against the wall, a low side table, and a plant in the corner. This setup works well for readers, meditators, or anyone who spends time on the floor. It is especially effective in studios with a bay window or a window seat, where a low cushion can sit directly in the sill.
The cost is low: a set of large floor cushions from Amazon or IKEA runs $40 to $80, and the pillows you already own work fine to start. The visual effect in a small studio is significant because a cozy floor area signals that the space is lived-in and personal, not just efficiently organized. Style tip: use a warm terracotta or rust tone for the floor cushions. It reads as intentional color-blocking even in a predominantly white or neutral studio.

What to Check Before Buying a Murphy Bed
Before you order anything, run through this checklist to avoid expensive surprises:
- Wall type: Murphy beds mount into wall studs. If you live in a concrete or cinder-block building, you will need masonry anchors or a freestanding base frame. Ask your super or building manager about wall construction before you order.
- Ceiling height: Standard Murphy bed cabinets require at least 84 inches (7 feet) of ceiling clearance. Some queen panels need 88 inches. Measure twice before you commit.
- Floor clearance: The bed panel needs 60 to 80 inches of floor space in front of the wall when it is fully deployed. Mark this zone on your floor with painter’s tape to confirm the layout works with your existing furniture.
- Mattress thickness: Most Murphy systems are designed for mattresses 10 to 12 inches thick. A mattress thicker than 12 inches may not fold away cleanly and will compress over time.
- Landlord approval: Many landlords treat Murphy beds as permanent structural modifications because of the wall anchoring required. Get written permission before drilling into any wall. Some freestanding systems require no wall anchoring at all and are a better option for renters who want flexibility.
The Takeaway
Studio apartment ideas with murphy bed setups come down to one core principle: treat the bed as a wall feature, not as furniture. Whether you go with a full built-in storage system, a sofa-Murphy combo, or a budget loft bed alternative, the goal is the same. The bed disappears when you do not need it, and the room becomes whatever you want it to be.
The 12 setups in this guide cover most studio floor plans and budgets. Start by measuring your main wall, confirming your ceiling height and wall type, then choose the configuration that gives you the living zone you actually want. Even the simplest fold-down panel makes a real difference in how a studio feels and functions day to day. You do not need to spend thousands to see results: setups 8 and 12 in this list cost under $200 and will still transform the way you use your space.
Related Reading
Looking for more ways to maximize your studio layout? Start here: