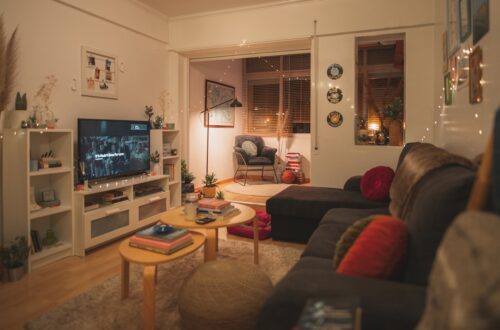
Your landlord gets the final say on your walls, but that does not mean you are stuck with blank beige for the next twelve months. A renter-friendly gallery wall costs less than a dinner out, installs in an afternoon, and comes down without leaving a single mark. These 15 ideas prove you do not need a drill to have a home that actually looks like yours.

Why Gallery Walls Are a Renter’s Best Kept Secret
Renters skip gallery walls for two reasons: the fear of losing their deposit and the assumption that you need expensive tools or a lot of space. Both are myths. Adhesive products, clever leaning techniques, and textile art have made drills optional for at least a decade. The real secret is that a curated wall of art does more decorating work per square foot than almost any furniture purchase. It anchors a room, sets a mood, and makes a space feel intentional rather than temporary.
Gallery walls are also one of the fastest reversible improvements you can make to an apartment. Unlike painting, which some landlords allow and others do not, a no-drill gallery wall leaves the walls exactly as you found them. You can redesign it on a Saturday afternoon, swap out prints as your taste evolves, and move the whole thing to your next apartment without buying anything new.
- No power tools or landlord permission required
- Can be done for under $50 using budget frames and free printable art
- Completely reversible in under an hour when moving out
- Works in any room: living room, bedroom, hallway, or home office
Command Strips and Adhesive Hangers: The No-Drill Answer for Apartment Wall Decor

Command strips are the single most important product for renter-friendly gallery walls. The standard large picture strips hold up to 16 pounds each, and the extra-large version handles up to 20 pounds. A typical 11×14 inch framed print weighs about two pounds, which means one pair of strips holds it with plenty of margin to spare.
The key to making adhesive strips work long term is surface prep. Clean the wall with rubbing alcohol and let it dry completely before applying strips. Press the strip onto the frame, then press the frame firmly against the wall for 30 seconds. Do not hang anything for one hour after application. When removing, pull the tab straight down slowly instead of pulling the frame away from the wall. Done correctly, Command strips remove cleanly without peeling paint on standard flat or eggshell finishes.
For heavier items like large canvas prints or mirrors, look for picture-hanging strips rated for 5 pounds per strip pair. Using four pairs instead of two on a heavier piece distributes the weight and gives you a safety margin.
- Command Picture Hanging Strips (Large): holds up to 16 lbs, about $9 for 8 pairs
- Gorilla Heavy Duty Mounting Tape: better for very smooth or glossy frames
- 3M Claw Drywall Picture Hanger: leaves a pinhole smaller than a thumbtack if you want a nail-like result
- Scotch Wall-Safe Tape: for paper art, posters, and lightweight unframed prints
The Floor-Leaning Gallery: Zero Holes, Maximum Style

The leaning gallery is one of the most underrated renter-friendly techniques. Prop large framed prints directly against the wall on a console table, dresser, or the floor itself. Layer two or three pieces at different heights, overlapping slightly, to create depth. This works especially well in entryways, behind sofas, and in bedroom corners.
A few things make a leaning gallery look styled rather than abandoned. First, choose frames that coordinate in either color or material. All black frames, all natural wood frames, or a mix of black and gold reads as a deliberate choice. Random plastic frames from different eras look like a storage pile. Second, add something three-dimensional in front of the leaning art: a small plant, a stack of books, or a candle grouping. The layering creates a vignette that feels finished.
For a bedroom floor gallery, lean oversized prints against the wall at floor level behind your bed. A 24×36 inch poster in a wood frame reads almost like a headboard when positioned this way. You can find large format prints on sites like Society6 or Desenio for $20 to $40, and Walmart sells 24×36 frames for under $20.
- Use furniture as a base: sideboards, dressers, or shelving ledges all work
- Vary print sizes: one large anchor piece plus two or three smaller ones creates balance
- Keep the floor clear directly in front of leaning art to avoid a cluttered look
- Beeswax putty applied to the bottom of frames prevents accidental tipping
Budget Art Prints: Gallery-Quality Renter-Friendly Wall Decor Under $30

Art does not have to cost hundreds of dollars to look like it did. There are several reliable sources for beautiful prints under $10 that look great once framed:
- Unsplash and Pexels: Free high-resolution photography you can print at any Walgreens or CVS for under $5 in 8×10 size
- Etsy printables: Downloadable art files for $1 to $5, print at home or at a copy shop
- Pages from old books and atlases: Thrift store finds. A vintage atlas page in a simple frame is a classic gallery wall element
- Museum collection downloads: The Metropolitan Museum and the Art Institute of Chicago offer thousands of high-resolution images from their public domain collections for free download
- Personal photos printed large: A 16×20 print from Shutterfly costs about $10 and makes a powerful anchor piece
For frames, IKEA’s Ribba frames ($5 to $15 depending on size) are the most popular budget option. They come in black, white, and natural wood and include a mat that elevates even simple prints. Target’s Threshold line and Amazon’s Distressed Wood frames are also solid choices in the $8 to $25 range.
The trick with budget art is consistency. Pick one palette (all warm tones, all black and white, all botanical subjects) and buy several prints that share it. A cohesive collection of inexpensive prints always looks better than a random mix of expensive ones.
Macrame and Textile Wall Hangings: A Renter-Friendly Gallery Wall Alternative

Macrame and woven wall hangings are a natural fit for renters because they are lightweight, require only a single small hook to hang, and add texture that framed prints cannot. A 24-inch macrame piece typically weighs under 8 ounces, well within the range of a single adhesive hook rated for 3 pounds.
You can find handmade macrame wall hangings on Etsy for $25 to $80 depending on size and complexity. IKEA, Urban Outfitters, and World Market all carry more affordable mass-produced versions in the $20 to $40 range. For a DIY option, macrame starter kits with cotton rope and a wooden dowel cost about $15 on Amazon and produce a beginner-friendly piece in about four hours.

Beyond macrame, consider these no-drill textile options:
- Woven tapestries: Hang with a tension rod resting on two adhesive hooks
- Framed fabric: Stretch a piece of patterned fabric over a canvas frame for a one-of-a-kind textile print
- Wicker wall baskets: Grouped in sets of three or five, these add shape and dimension without looking flat
- Quilt panels: A vintage quilt hung horizontally above a bed acts as both headboard and art
The Eclectic Salon Wall: How to Mix Frames and Build a Renter Gallery
The salon wall style, inspired by the floor-to-ceiling art displays of 19th-century European galleries, is having a serious moment in apartment decorating. The approach is deliberately dense, with frames of different sizes, shapes, and styles covering a large section of wall. The result looks intentionally curated rather than random if you follow a few basic rules.
Start by anchoring the arrangement with one large piece: a 24×30 or larger print, canvas, or mirror. This becomes the visual center and everything else orbits around it. Work outward from that anchor, placing the next-largest pieces first and filling gaps with smaller frames. Keep the spacing consistent, about 2 to 3 inches between frames, to avoid a cluttered look.
Frame variety is what makes a salon wall feel collected rather than store-bought. Mix ornate gold frames with simple black ones. Include one or two frames with mats and a few without. Add a small round mirror for shape variation. The mix signals that each piece was chosen individually over time, which is exactly the feeling you want.
- Lay the arrangement on the floor first and photograph it before putting anything on the wall
- Use paper templates cut to frame size and tape them to the wall to preview placement
- Unify the collection with a consistent color palette across all the art itself
- Leave one or two hooks empty as you build; it invites adding to the collection later
Bedroom Gallery Walls Over the Headboard

The space above the bed is one of the most impactful walls in any apartment, and it is often underused. A gallery wall in this spot transforms a bedroom from a room with a bed into a room with a real design point of view. The height of the wall, the fact that you see it every morning and evening, and the visual weight it adds all make it worth the effort.
For above-bed gallery walls, a horizontal arrangement tends to work better than a tall vertical cluster. Aim for an overall grouping that is roughly two-thirds the width of your bed. Center it above the headboard or, if you have no headboard, position the lowest piece about 8 to 12 inches above the pillow line.

A single oversized print (36×48 inches or larger) can replace an entire gallery arrangement and create even more impact. Print a high-resolution landscape, abstract, or botanical from a museum archive, take it to a print shop, and frame it for under $60 total. This single-piece approach is especially good for renters who want a dramatic look without managing multiple hanging points.
- Keep art at least 6 inches below the ceiling to avoid a crowded look in rooms with low ceilings
- For leaning prints behind the bed, use furniture putty on the back bottom corners to prevent slipping
- Warm-toned art, botanical prints, and abstract earth tones all work well in sleeping spaces
- Avoid art with high-contrast patterns directly above the bed as it can feel visually restless at night
How to Plan Your Gallery Wall Layout Before Anything Touches the Wall

Hanging things, moving them, and hanging them again is the fastest way to multiply small holes and frustration. Planning on paper or on the floor first eliminates both problems. Here is the process that works consistently for apartment gallery walls:
Step 1: Measure the wall space. Use tape to mark the outer edges of your intended gallery area on the wall. This gives you a clear canvas to work within and prevents the arrangement from drifting too wide or too narrow.
Step 2: Trace each frame on kraft paper or newspaper. Cut out the templates, note where the hanging hardware sits on the back of each frame, and mark that spot on the template. Tape all the templates to the wall using painter’s tape. Rearrange freely until you love the layout.
Step 3: Mark hanging points through the templates. Once the layout is set, use a pencil to mark through the hardware dots on each template. Remove the paper and apply your adhesive strips or hooks at those marks.
Step 4: Hang in order from the center out. Place your anchor piece first, then work outward. Check level frequently with a small bubble level or a level app on your phone.
- Aim to keep the visual center of your gallery arrangement at eye level, about 57 to 60 inches from the floor
- Above a sofa, leave 6 to 8 inches of space between the top of the sofa and the bottom of the lowest frame
- For an asymmetrical arrangement, weight the heavier visual elements to the left to follow natural reading patterns
- Photograph the final layout before committing to strips in case you want to recreate it later
The Takeaway
A renter-friendly gallery wall is not a compromise on style. It is a deliberate choice to invest in your space without investing in permanent changes. Command strips handle more weight than most people expect. Leaning art looks intentional when styled correctly. Budget prints in quality frames look expensive. The blank walls in your apartment are not waiting for permission. They are waiting for you to decide what to put on them.
Related Reading
If you are working on your apartment style beyond the walls, these Snug Apartment guides are the natural next step:
- 21 Boho Small Apartment Decor Ideas Under $50 (Renter-Friendly) for the full bohemian look on a budget
- 11 Earth Tone Color Palettes for Small Apartment Decor to find the right backdrop for your gallery wall
- 15 Convertible Furniture Ideas for Tiny Apartment Renters for making the rest of the room as functional as your walls are beautiful